 Hello it's spring but I'm not really feeling very springy. Outside spring is in full swing. But inside my home I've still got my Valentines bunting up! In my head I was going to make some spring Crochet bunting. In fact I even started to make some but I just didn't like it. So I'm on the look out for something someone else has made. I will let you know how I get on. A granny SHAWl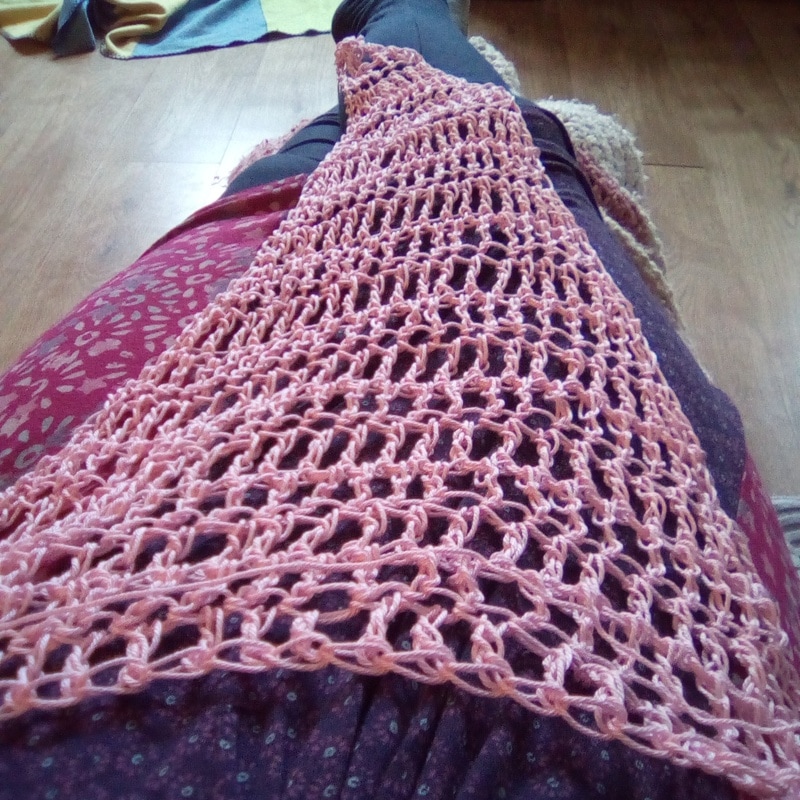 I had a little spring clean, well actually I nearly halved my wardrobe which was kind of worrying although I only took out what I don't like and what no longer fits as I have dropped a dress size over the last year. Which is what made me start my shawl. I really love the idea that I could make something to wear. So the shawl I am hoping will give me the confidence to start a summer cardigan. Stupidly I didn't follow a pattern I just started with 3 tr in a magic circle then I Crochet 3 turned and TR back added 2 TR in each end chain. Now I didn't count how many rows to make but I've reached a length I'm happy with and now need to decrease. But I'm not 100% sure how. Lets hope I figure it out. Painted pots 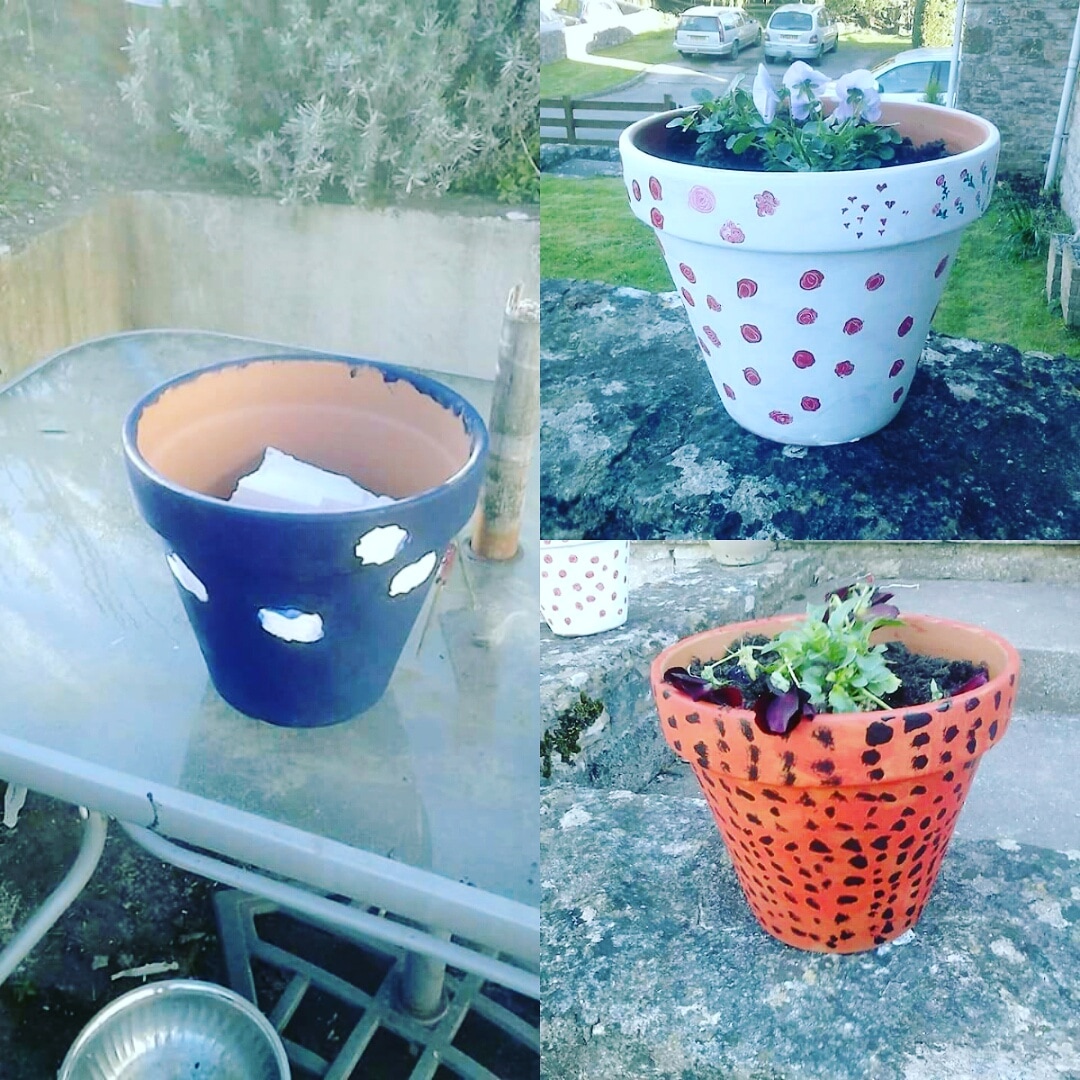 I like to have flowers in the garden and when i saw these large terrigotta pots i knew they would perfect for my girls to decorate. We used acrylic paints and a coat of varnish. Then filled with fresh soil and flowers. We still have one more to finish. If i was doing this again I would use smaller pots as it takes a while and young children might get board. Easter bunting Can you remember the pound shop papers i purchased well i popped them into my silhouette and cut out the words Easter.  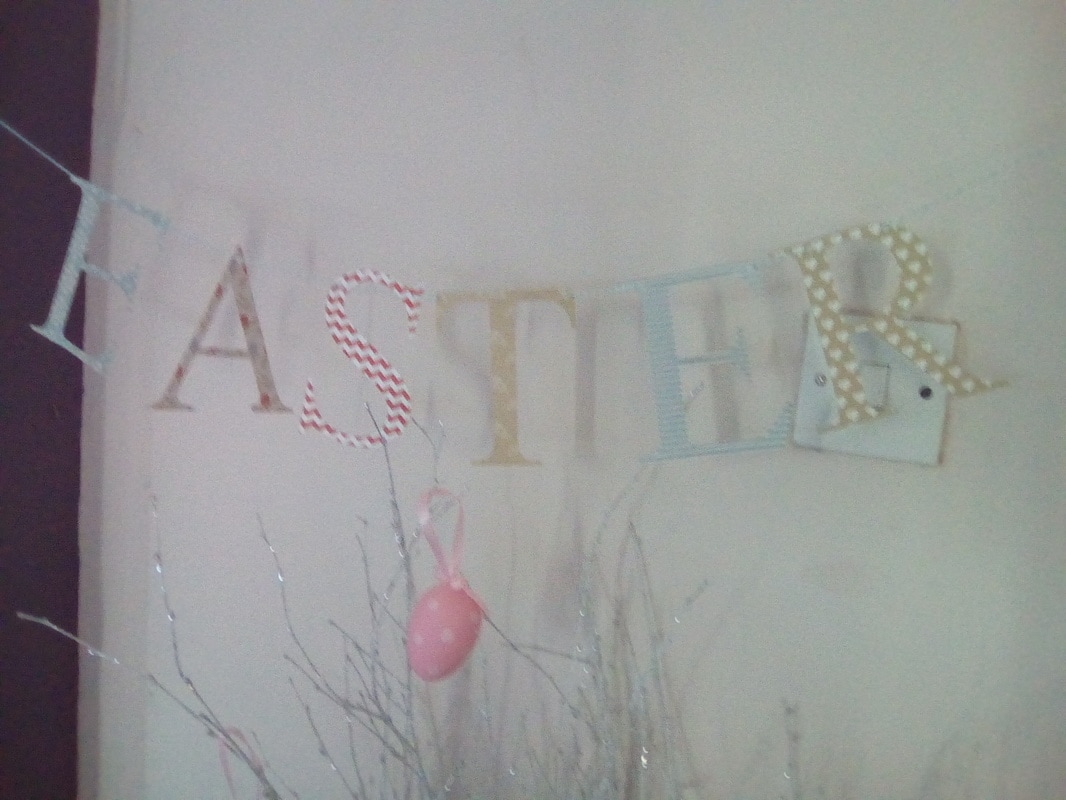 As always it's been a creative week and busy one with my youngest on half term and I've really enjoyed spending time with her. I will leave you with some pictures of what I have been up to. Have a lovely weekend every one. Xxx
0 Comments
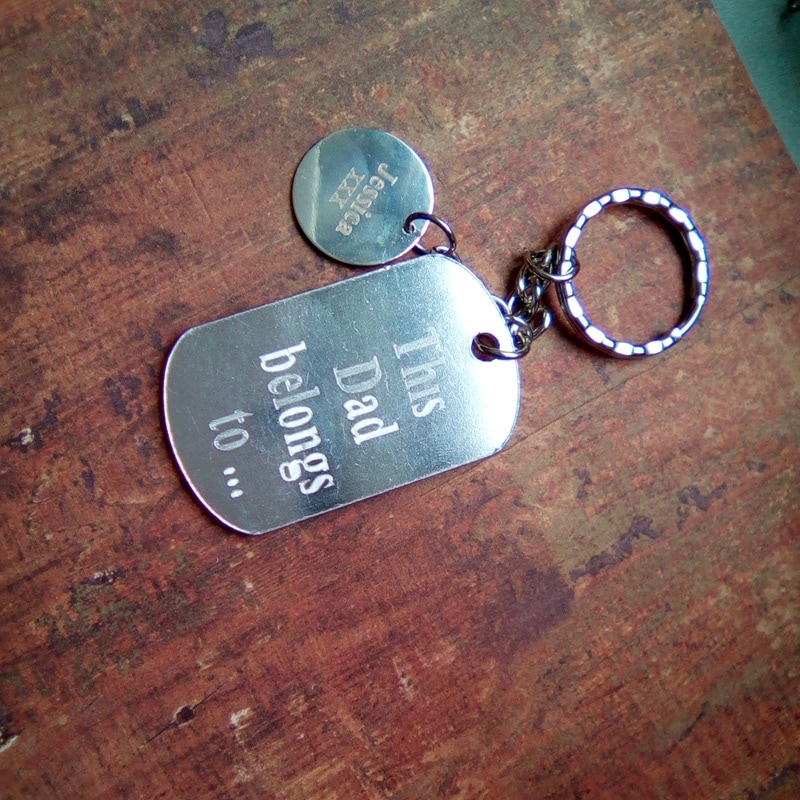
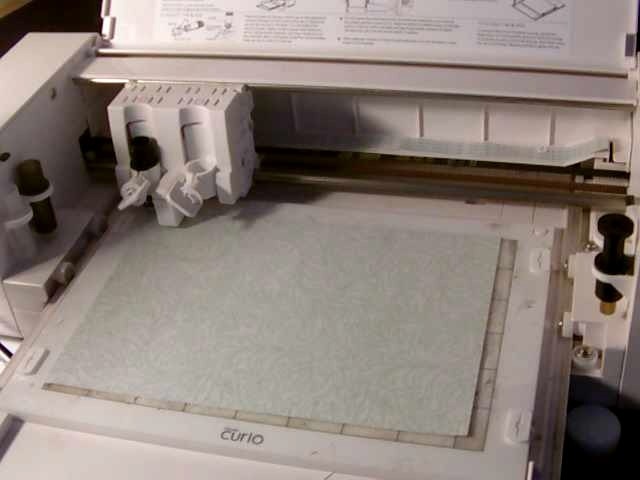 I have a confession to make its the Saturday before mothers day and I have had such a busy week I haven't made any mothers day gifts yet! If you know me personally you will know I have just launched a new facebook page called Create Personalized Gifts which I work on making a range of products and putting together designs and I absolutely love it. Its very different to my business Said Lucy as its personalized photo gifts but that's taken most of my time this week so I'm sat at my desk in my jammies at 7.15 in the morning on my silhouette curio making some presents! The card My mother in law likes elephants so it had to be an elephant card. the file above cuts a complete card. But I didn't want a complete card I just wanted the elephant. Now in the software you can use the tools to remove him but I just the machine cut him out then I cut the rest by hand as it was very simple. 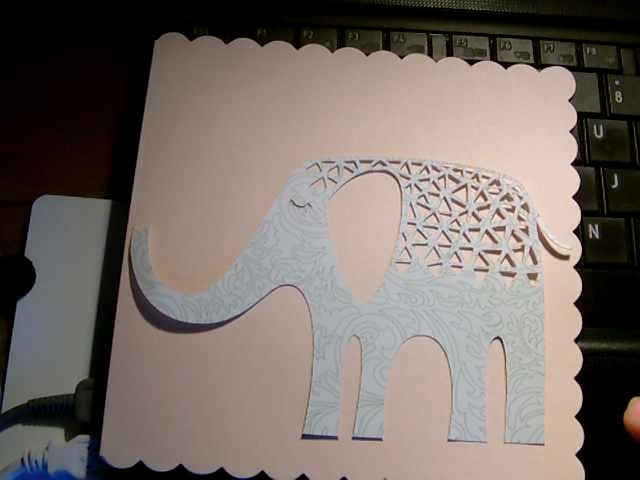 Next I used the bellissima letter stamps from do crafts to add the word mum to a die cut banner using sizzix dies. Then I used a tonic die and stamp set to make a have a wonderful day sentiment. I did both these using a linen texture paper from sizzix. Lastly I added lots of dots using dovecraft 3d pearl effects. 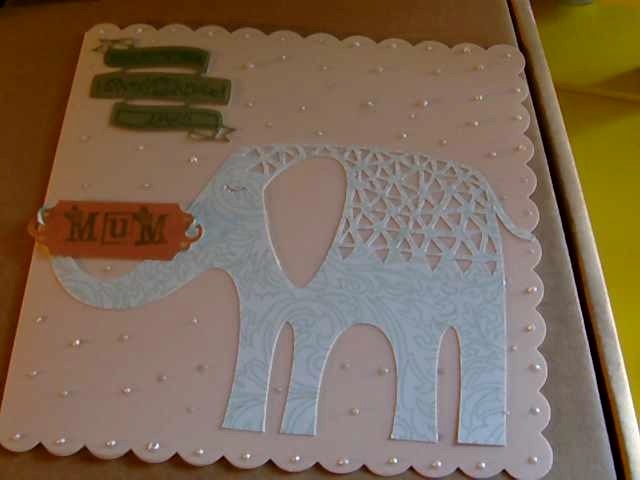 A slate coaster You can etch into slate using the curio but due to slates uneven texture its a little bit hit and miss but I wanted to give it a try for my mother in law. I picked a tribal elephant file by Studio Ilustrado. I sized the file to fit within my coaster and taped the coaster to the curio mat and sent it to cut. With the curio it only has so much pressure it can put into an object. Sadly the cut was to fine to really show up well. My mother in law is partially sighted so I'm sure she wouldn't have seen it. I decided to take a sharpie and do my best over the pattern. 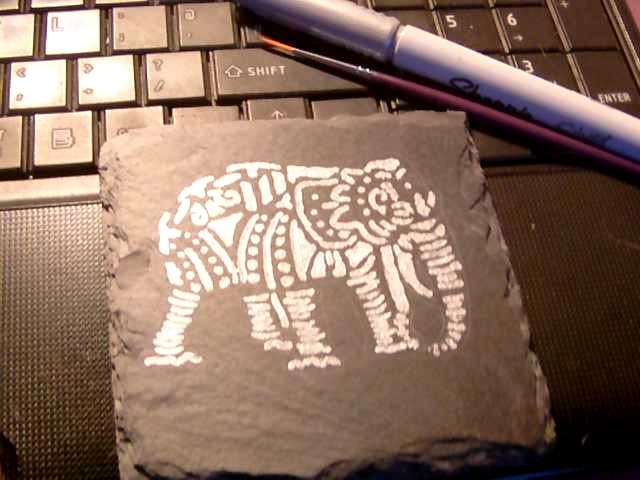 You can still see the etched line and its far from perfect but its the thought that counts. A coat of varnish to seal the design and its ready to box up.
I've still got another present to make but I will share that with you next week. What ever you are up to this weekend I hope you have a lovely one. Xxxx 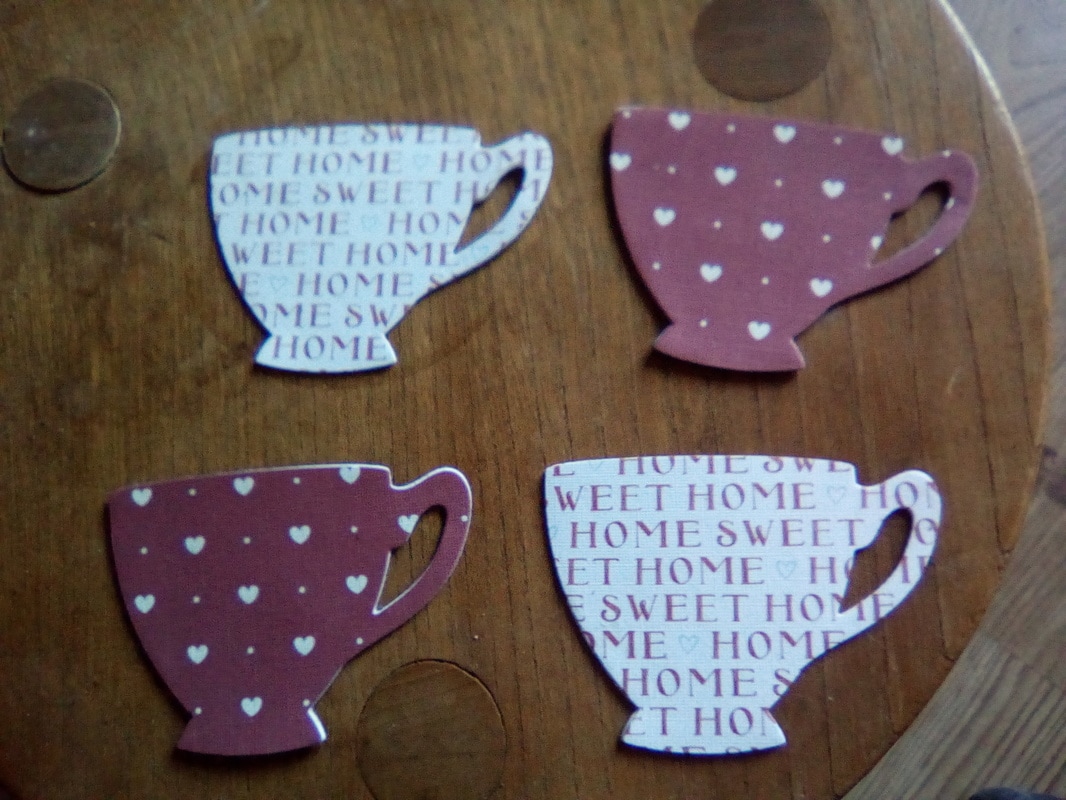 For some reason and I'm not sure why but I'm feeling a little brave at the moment. Im learning some new skills and it's challenging me big time!. In fact on Thursday I was so frustrated. Nothing was going right and I was seriously frustrated. A few years ago ( um probably 17!) I took a course called the computer driving license or something like that! It took me round the basics of using a computer. Jump forward to now and I'm saving, cropping, snipping, printing, using software programs and basically just getting back into using a computer for crafting rather than for just blogging. Perhaps that's why I really want to learn to use my cutting machines for things I haven't before. In fact my creative motivation is massive at the moment. But my creativity isn't restricted to just my cutting machines. The picture at the top of the page is actually magents. You can actually buy thin magnet sheets now which can be cut with a die cutting machine. To make these I used Stampin up tea cup thinlet die I did do a double roll to ensure it cut and it cut beautifully in my trusty big shot. Then I cut some Papermania country paper which is a linen look paper with same die and stuck them on. 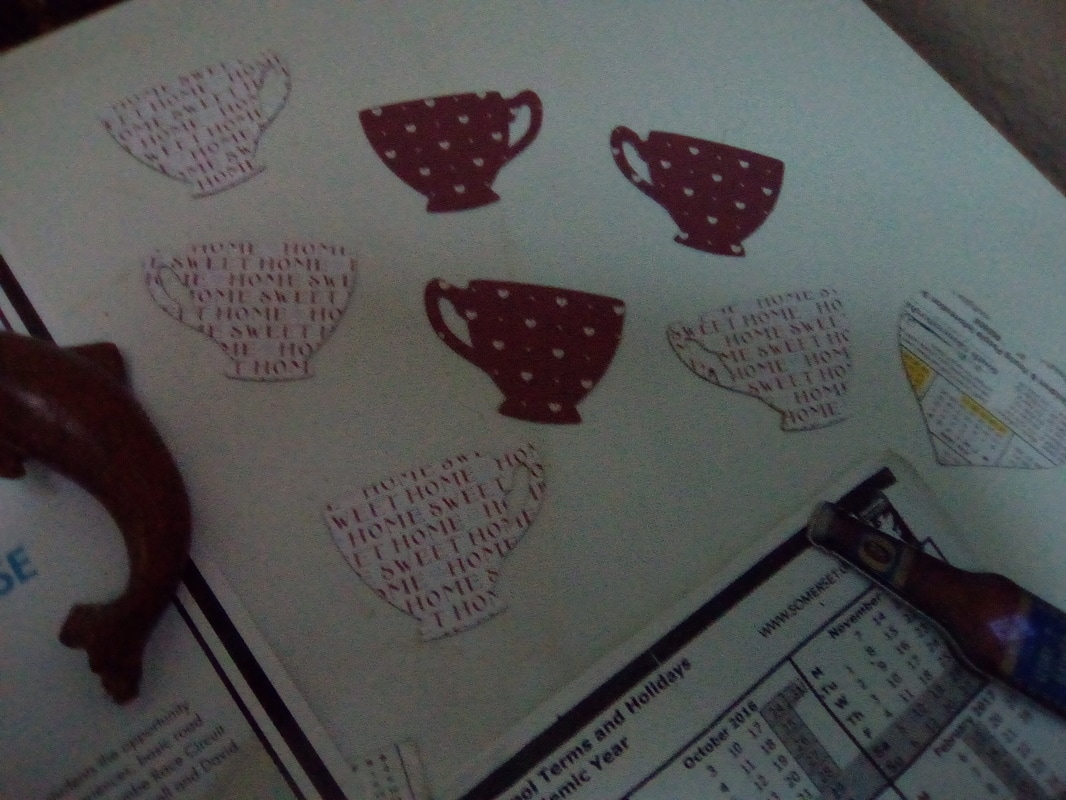 Whilst I think they are lovely and I'm more than happy to have them on my fridge the edges aren't secure and I've already pulled one of when removing a magnet. The joy of experimenting. I'm excited to see what else I can do with these magnet sheets! Bath melts 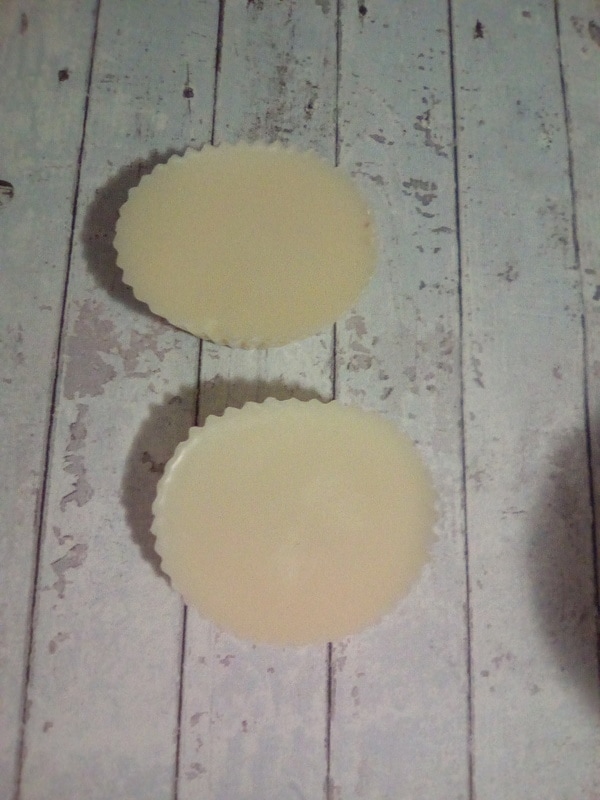 I love having a bath I know not the best option for the environment so I save my bath as a once a week treat and stick to showers in the week.
So I want my bath to be as luxurious as it can be I've been making my own bath melts. To be honest they are so easy. You need Shea butter or coconut oil 1 cup Essential oils I use Lavander for coconut or rose or sweet orange for Shea butter. 5 drops of vitamin e oil. Silcone moulds. Simply melt your coconut oil or your Shea butter in a pan on the lowest heat until it melts remove from the heat and then add 5-10 drops of your choosen oil plus your vitamin e oil. Mix and pour into the moulds allow to cool and store them in the fridge until you need one. Simply pop into the bath. A WORD OF WARNING I'm not a skincare specialist I've taken this from different recipies I've found online and adjusted it to my needs. You may wish to do a skin test to ensure you don't react to any of the ingredients. Also these are seriously moisturising so you will need to clean your bath well after!. Well as you can see this is just a small section of what I've been up to!. Check back next week as I attempt to make my own stickers.  Hello just a quick blog today and I wanted to share how easy it is to use your silhouette around the house. This week we finally picked up a new bin for the kitchen. This bin is to be the one to store our recyclables until they go out to the recycle bin outside. Now it's much smaller than our normal kitchen bin but to ensure visitors and my children use it for its purpose I want to make some vinyl words to tell you what you can put in it.. With vinyl you can stick it to most flat surfaces. Infact if you look around the silhouette store you will find a whole list of words to help you. Choosing a font and a colour will be crucial to making sure people can see what they should be putting into the bin. I choose the following words and I choose a really simple font so it's easy to read for little ones. 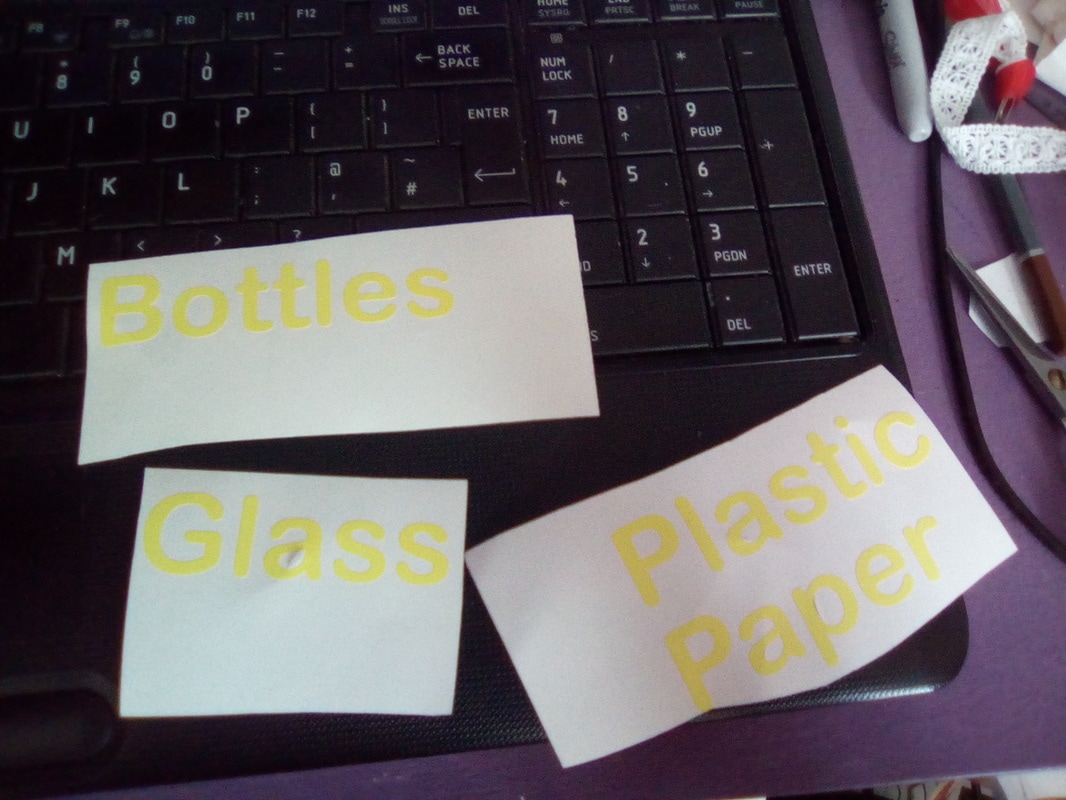 Vinyl is one of the most simplest things to cut on the silhouette. If you are using a cameo to cut vinyl and have a large roll of vinyl you can simply load the role into the machine. 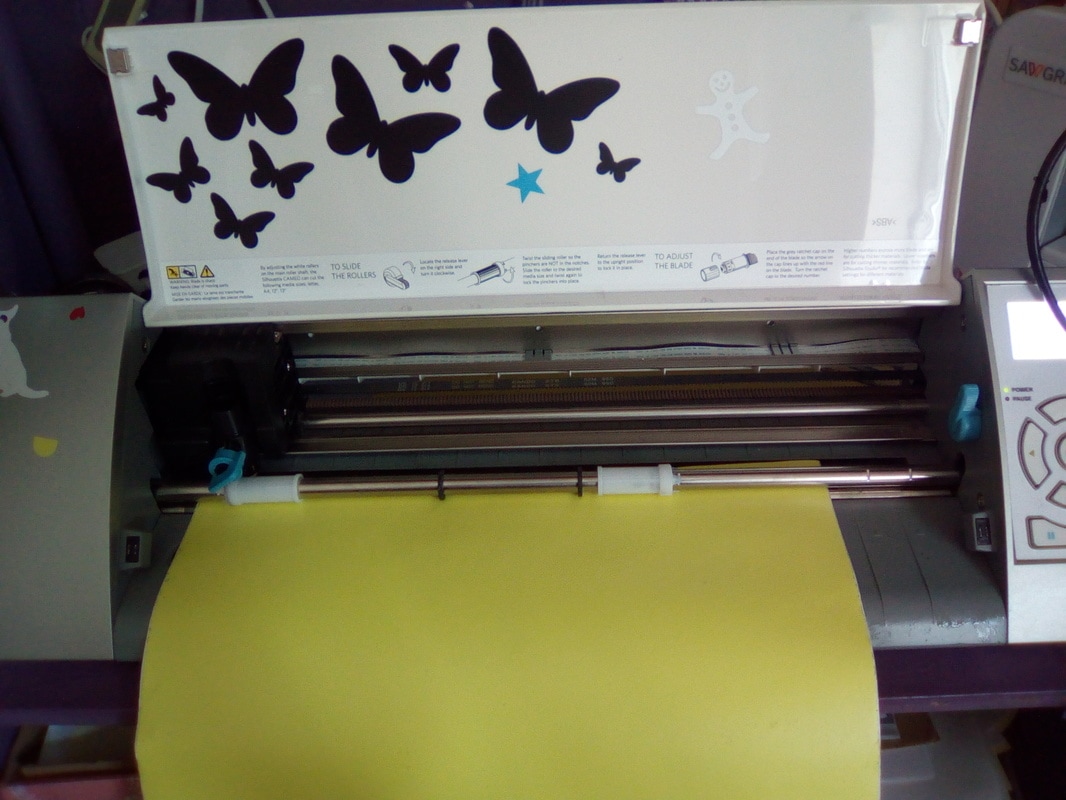 If your using up pieces of vinyl the you will need to load a mat with your vinyl on. Once cut you need to remove the vinyl you no longer need. With a good design like this it's very easy to remove what you don't need. Then apply transfer paper to your words. I then cut each word out and remove the backing paper. Next place your vinyl down on the bin lid and using a credit card run over the design before removing the transfer paper. 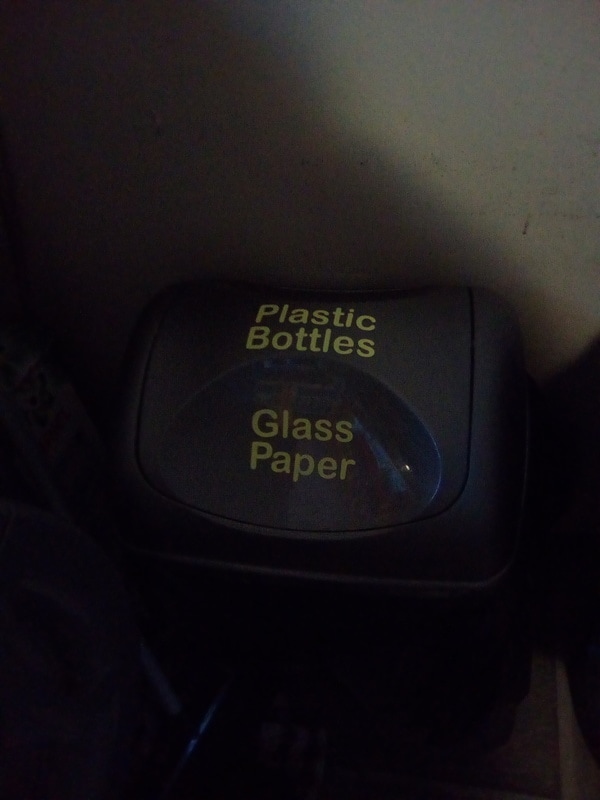 I'm determined to use my machines much more and my next project? Well it's got to be print and cut. Yep I want to make my own stickers.
Make sure you check back soon. Xxxx 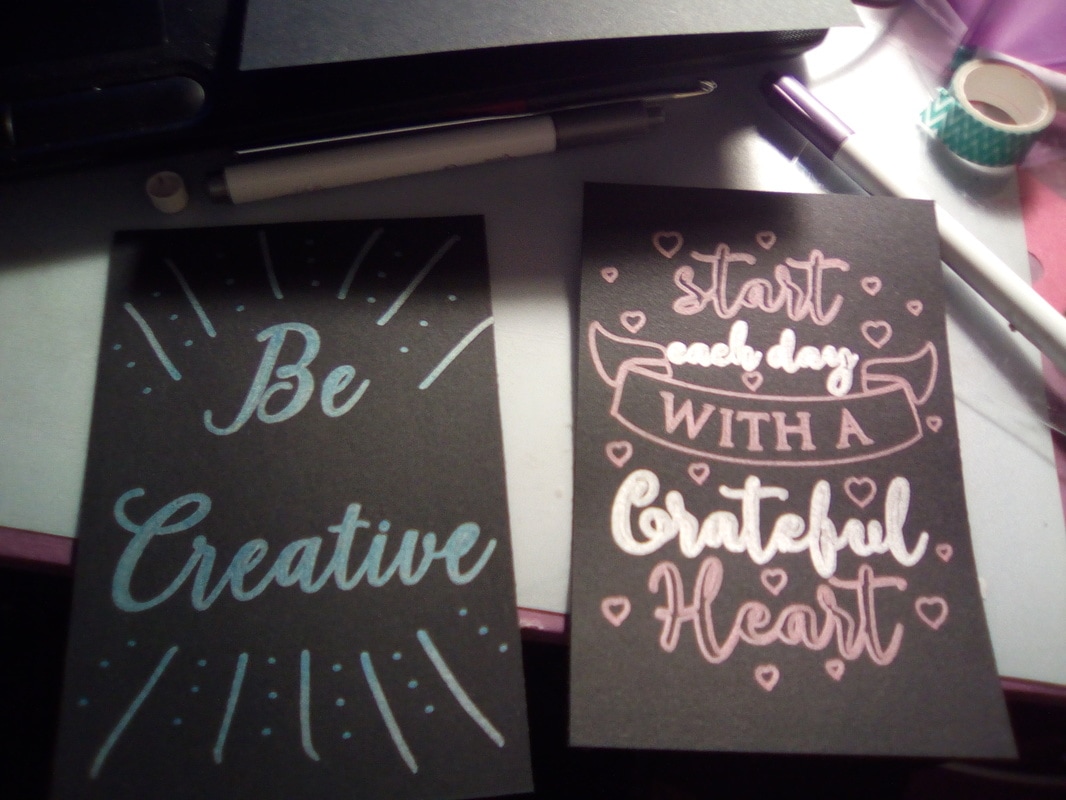 I am lucky enough to own two types of silhouette machines. If your not sure what a silhouette machine is then let me briefly enlighten you. These machines connects to a computer and using the silhouette software allows you to design an image or buy one from the store then the machine will cut out the image for you. Different machines will cut different media and they have slightly different features. I won't go into that now but I will be bringing you some demos very soon. The point of today's post is that I need to use my machines a lot more. So you can expect regular blog posts when we look at exactly what you can do with these machines. This weekend I cut some vinyl images and words for my daughters Welly boots, sadly what I didn't know was they need 72 hours to set apparently but she couldn't wait and some of the design came off. 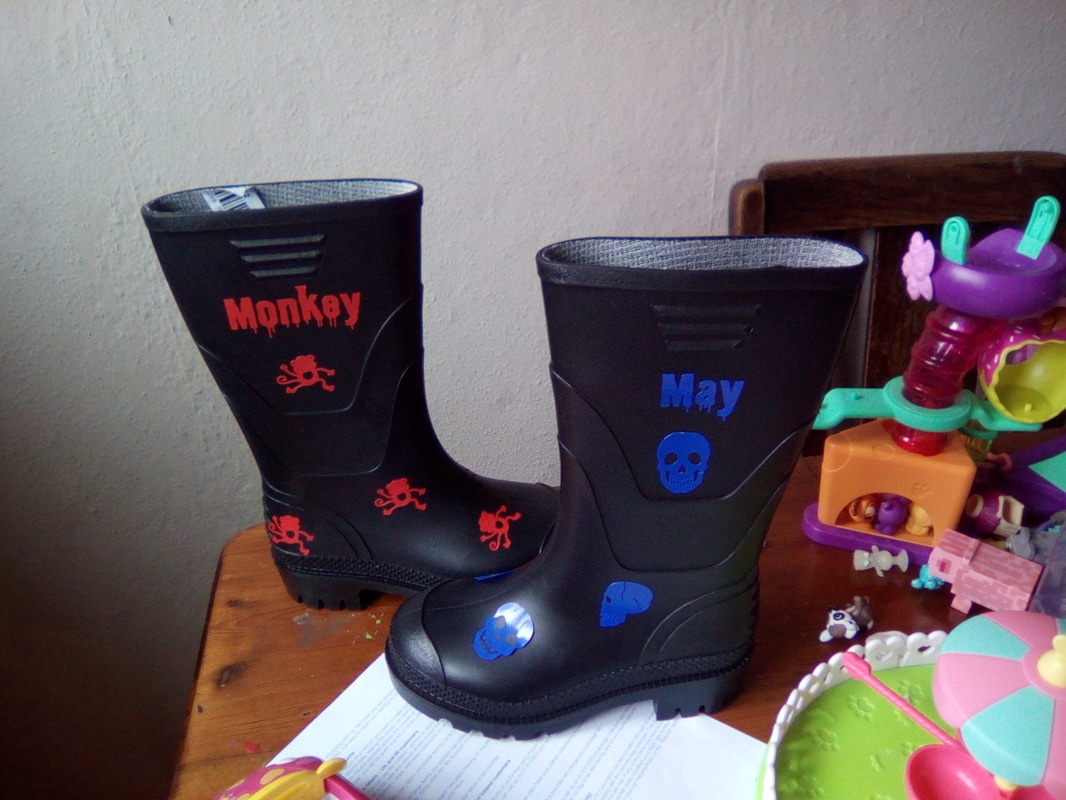 Not to worry I can simply cut some more.
This is what I mean about me not using the machine to it's true potential. But that will change and I am wanting to make a painted wooden sign in time for Easter as well as a few other ideas I have in my head. Enjoy your Sunday xxxx |
AuthorHello Thank you for taking a peek at my page. My name is Lucy and I adore craft and the methods and process behind it. Why not join me and see what I am up to.
Archives
August 2022
|

 RSS Feed
